ROS Group 产品服务
Product Service 开源代码库
Github 官网
Official website 技术交流
Technological exchanges 激光雷达
LIDAR ROS教程
ROS Tourials 深度学习
Deep Learning 机器视觉
Computer Vision
Bluewhale ROS system image released
-
This article lists all published Bluewhale ROS system images, users can choose according to their needs. The Bluewhale ROS system image is the image of the ROS system created by Bluewhale Robot based on Ubuntu ROS.
It contains the ROS system and some common ROS packages. Ideal for ROS learning and developers. After the installation of the system is complete, you do not need to install and configure ROS. You can use it directly. The Bluewhale ROS image is also the system image of Xiaoqiang and can be installed directly on Xiaoqiang.Note: It's recommended to useVmware PlayerSystem configuration requirements
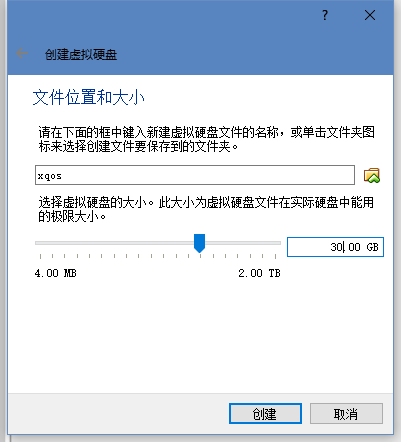
Minimum memory 1.5G recommended 2G, storage space at least 30G.
Latest Kinetic Image
xq_os_v2.0.8-2018-09-11.iso(kinetic version) can be used on Xiaoqiang Pro and your own computer.
Download Address
md5: 0a2d98bbf93d9556163df26fe42a072cxq_os_lungu_v2.0.5_2018-7-8(kinetic version) can be used on Xiaoqiang XQ5 and can your own computer.
Download address
md5: 6e4dda157e2b96bf271f5f4e33e181e2xq_os_v2.0.6_mini_2018-07-19(kinetic version) can be used on Xiaoqiang mini and your own computer.
Download Address
md5: 8696d1e74a10123568db0dab2c6e1e01Latest Jade Image
xq_os_v1.0.3_2017-10-31Can be used on Xiaoqiang Pro and your own computer
Download Address
md5: afbf1c8026733c4f8063778846c84e9bxq_os_v1.0.4_mini_2017-11-17can only be used on Xiaoqiang mini
Download Address md5: e874c78088211dff3feabd92f86275e7Precautions:
After the download is completed, you must check md5 to confirm the integrity of the file. Note that when installing the image, the user name can only be
xiaoqiang, otherwise there will be problems.Image installation method
Install in a virtual machine
Open the virtual machine software. Download link
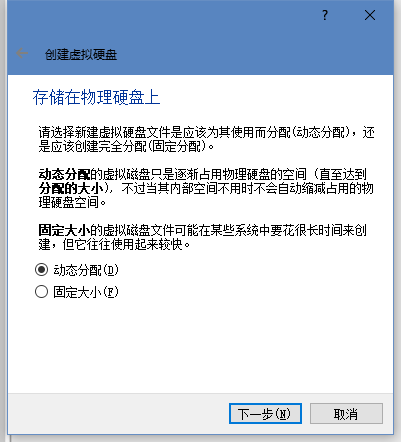
Click the create button to start creating a virtual machine. Note: please selectUbuntu 64when select system.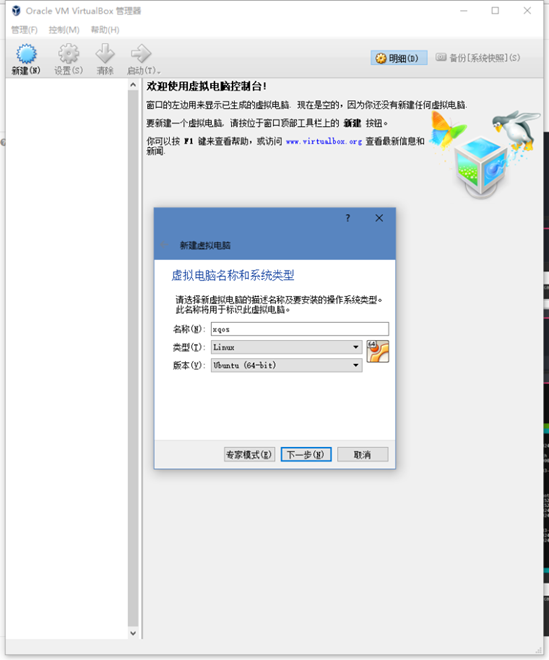
According to the settings on the image, click Next when finished.
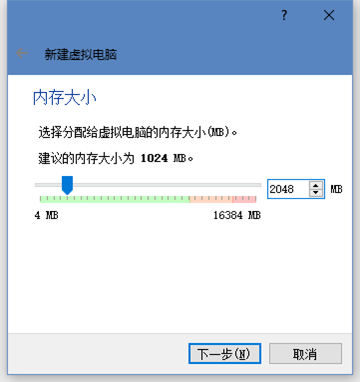
Memory is recommended to be set to 2G, if memory is too small, system may not able to start.
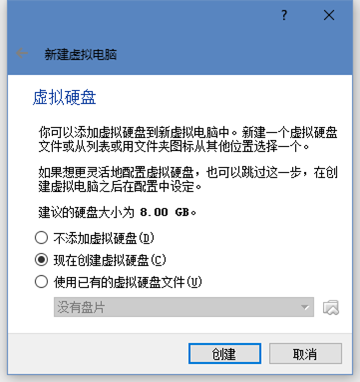
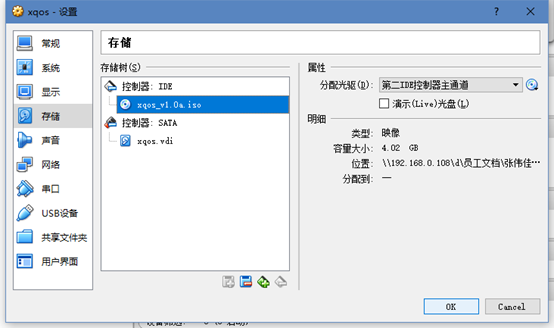
After setting is complete, click the Settings button above. In the popup dialog, select Storage. Then click the CD icon on the right of the storage interface to set the image file.
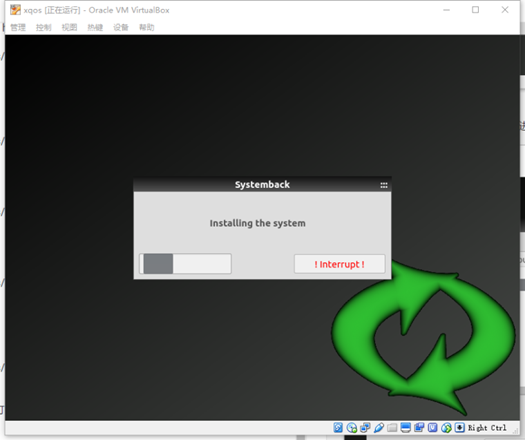
After the setting is completed, click the start button on the main screen. Waiting to load the system’s selection interface.
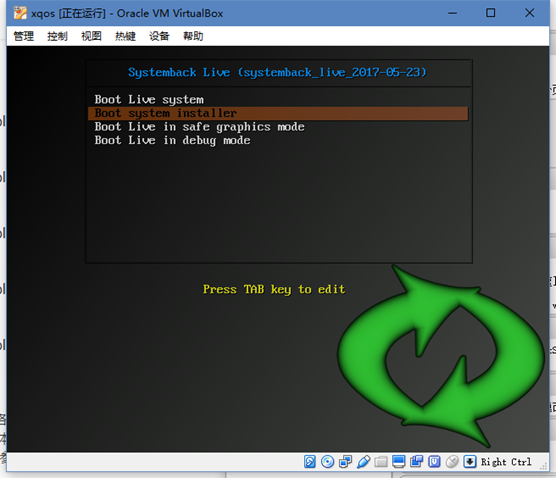
If you want to install the system, select the second option, then press Enter to confirm. Wait for the system installer to load. This process is related to your machine’s performance. If the machine’s performance is poor, it may take longer to load.
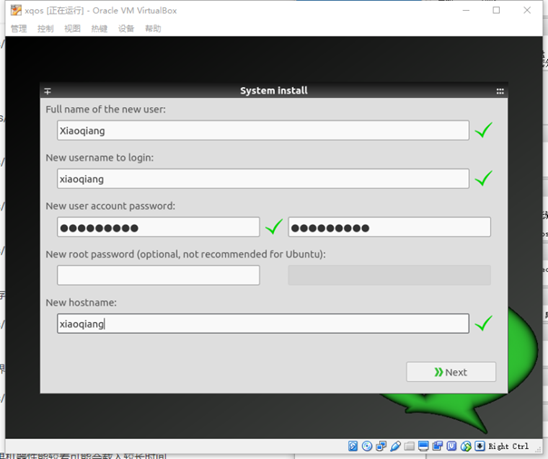
After the loading is complete, set the user information, note that the username can only be xiaoqiang, hostname can be set at will.

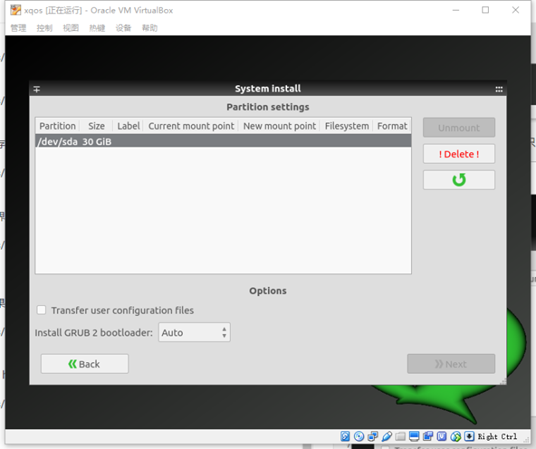
Click Next to enter the partition interface. Select the hard disk you want to install and click the Delete button.
Select the new partition in the hard disk again.
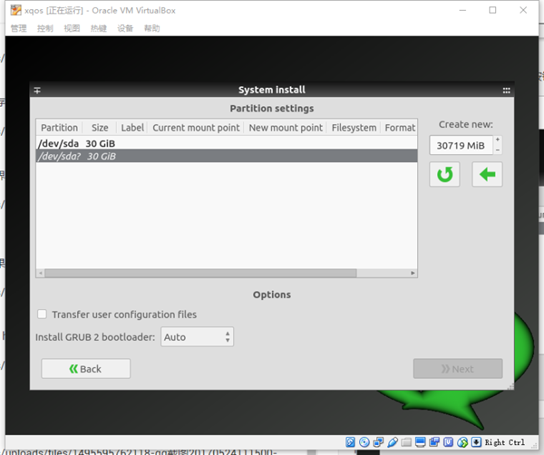
Click the arrow to go to the next.
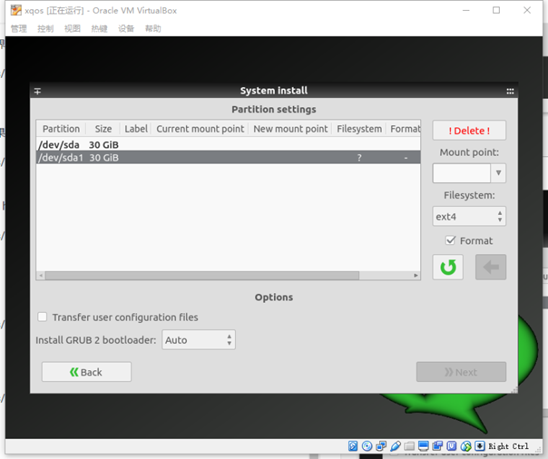
Select the newly created partition again, set the mount point on the right, click the arrow again to enter the next step.

Note: please check transfer user configuration filesClick on the next lower right corner to continue. If you still want to set up other partitions, follow the above steps.
Wait for the system to restart after the installation is complete.
Install on actual computer
The installation process is generally the same as the installation of Ubuntu. Here’s how to use USB disk to install the system. First you need to prepare a blank partition on your hard disk to install the system. Then download
ultroiso. Download address. Insert your USB disk into your computer. Open iso file with software. In the menu bar, select Start -> Write Disk Image, the popup interface is as follows.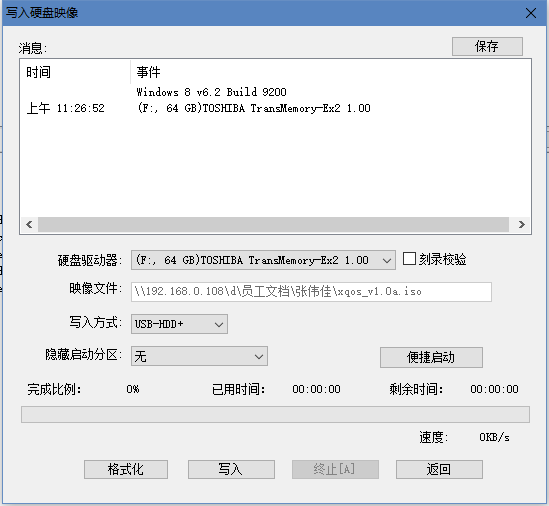
Click Write and wait for the write to complete.
After writing, insert the USB disk into the computer where you want to install the system. Enter the BIOS option at startup and select Boot from USB drive. The subsequent installation process is basically the same.
Note that in the partition, set boot as a separate partition, and then select the grub installation location. Otherwise, the system cannot be started after the installation is complete. There are also differences between partitions for different boot modes. Start with grub to give /boot a separate partition, boot with uefi to give /boot/efi a separate partition