ROS Group 产品服务
Product Service 开源代码库
Github 官网
Official website 技术交流
Technological exchanges 激光雷达
LIDAR ROS教程
ROS Tourials 深度学习
Deep Learning 机器视觉
Computer Vision
Visual Navigation Path Editor Tutorial
-
Using Xiaoqiang can create a three-dimensional map of the surrounding environment, but how to use this map to visual tracking? The Visual Navigation Path Editor was written to implement this feature. With this tool you can mark the trajectory in map. Then export the generated track file to Xiaoqiang, and Xiaoqiang will be able to move according to the track you have drawn. The following describes in detail how to use the software.
Installation
Ubuntu deb installation package can be downloaded here and the source code is here.
After the download is complete, execute the following command to install.
Note that this path editor is not compatible with the new version of the navigation program. For the new version of the navigation program, please use theWindows clientsudo dpkg -i path-drawer_1.0.0_amd64.debWait for the installation to complete.
Collecting spatial data
The path editor needs to load the spatial data collected by Xiaoqiang to be able to operate. For detailed operations, please refer to this article. After clicking the Save button, the map information will be saved to the
/home/xiaoqiang/slamdbfolder.Launch software
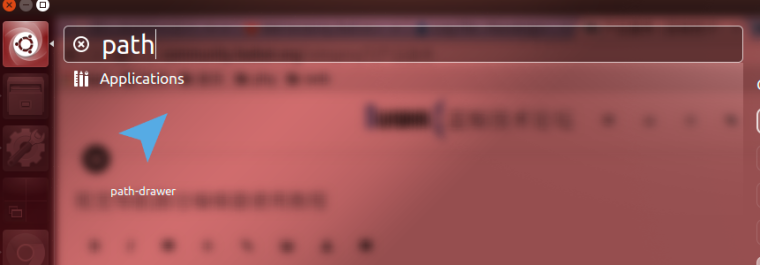
After the installation is complete, you can find the program named Path Drawer in the Ubuntu Dash menu, and click on the software icon.
Import Data
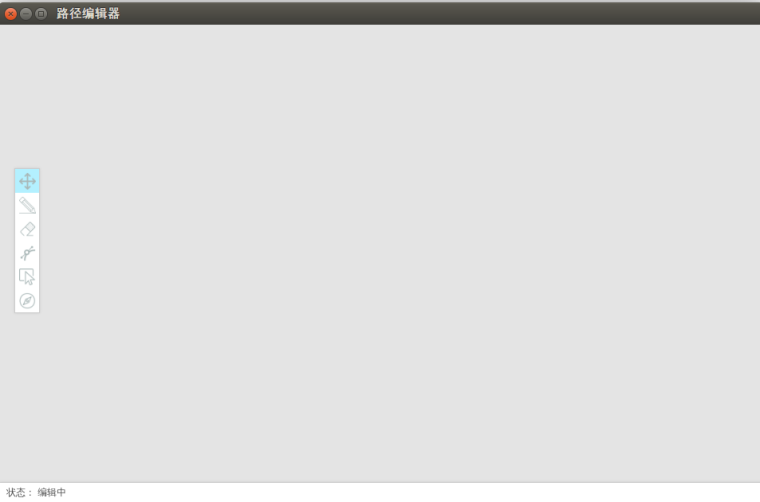
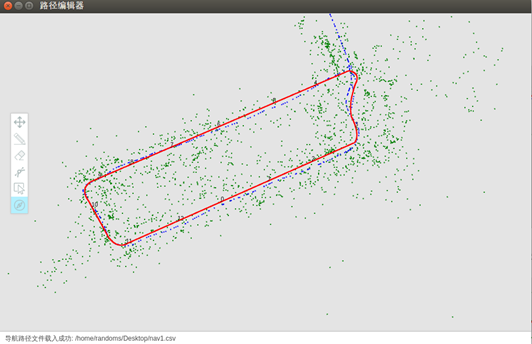
The software interface after startup is shown as below
In the menu at the top left, select File -> Import Map Data. In the file selection dialog that pops up, select the
/home/xiaoqiang/slamdb/mappoints.bsonfile. After import succeed, you can see the data of the map points in the software. This is a top view.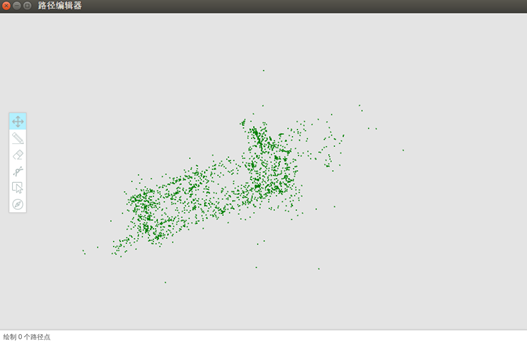
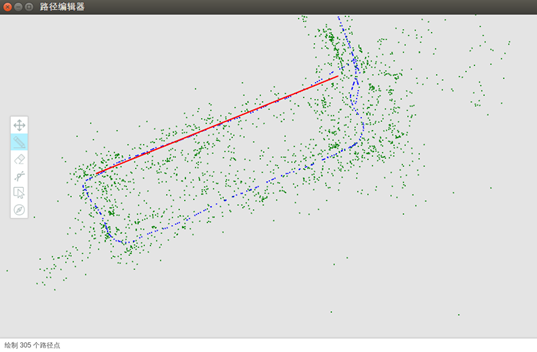
Then continue to select the file in the menu in the upper left corner and then import the path file. In the file selection dialog that pops up, select the
/home/xiaoqiang/slamdb/keyframes.bsonfile. After import succeed, you can see the path of the previous car walking in the software.
Draw a navigation route
The navigation path is the path you want xiaoqiang to walk. When the data is exported to Xiaoqiang, Xiaoqiang will move according to the path you draw. Here’s how to use the path drawing tool.
-
Basic operations Basic operations include panning and zooming. If you drag the map with the left mouse button, you can the translation of the map. The scrolling of the mouse scrolls can zooming of the map, which is very useful in the process of drawing paths. For more detailed requirements on the movement, you can zoom in and draw.
-
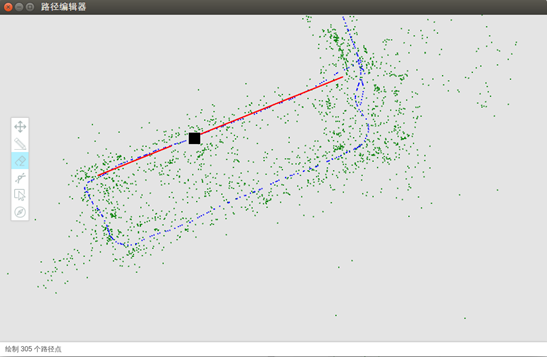
The line tool: clicks the pencil-like icon in the left-hand toolbar. This is the line tool. left mouse button click on any point on the graph, and then move the mouse will appear a red line. Move the mouse to the desired end position, click the left mouse button again, a straight line to draw the finished. After you click the left button, you can cancel the drawing by right-clicking.
-
The eraser tool: Click on the Eraser tool in the left-hand toolbar and then presses the left mouse button to drag to erase the previously drawn point
-
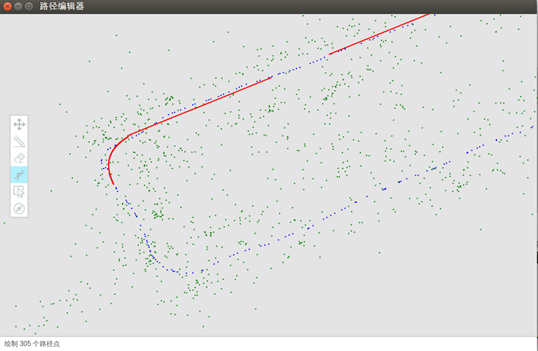
Curve tool: Click on the left Curve tool, click the left mouse button at the beginning of the curve, then click the left mouse button again in the middle of the curve, and finally click on the end point of the curve. So a curve is drawn and done.
-
Delete tool: if you want to delete a large range of points drawn before, then you can take advantage of this removal tool. Click the Delete tool on the left and click the left mouse button to delete the starting point, you can see in the mouse movement process has a rectangle has been following. Click the left mouse button again to delete the rectangle’s selected range. Right-click to cancel the selection.
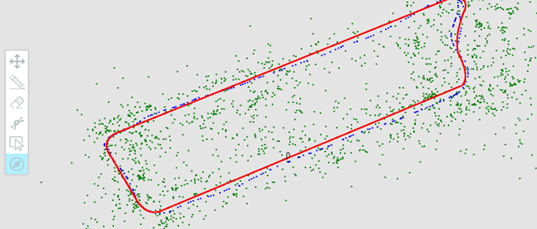
Using these tools, you can draw xiaoiang’s navigation path. Be careful to draw the line as far as possible along the original trajectory, so that the path is unobstructed during the movement. From the green map point you can see the terrain, based on the information to draw the points allowed by the range of motion.
Set navigation key points
For more complex graphics, there are many ways to move. For example, a figure-eight path, Xiaoqiang may move around one of the circles first, then move around another circle, or two circles may cross each other. Therefore, it is necessary to specify the specific way of the Xiaoqiang movement. Let’s take a circular trajectory as an example. In a circular trajectory, Xiaoqiang can move clockwise and also counterclockwise.
Click the navigation point settings button at the bottom of the toolbar on the left. Then start marking key points. Feel free to click on a point on the navigation route and you can see that there is a 0 at this point. This indicates that point 0 has been added here.
If you want to make Xiaoqiang counterclockwise, you can mark a point on the right side. Just add the key points in turn
Click the right mouse button to delete a recently added navigation point. You can also use the eraser and delete tools to delete navigation points. Xiaoqiang will move in the order of the key points.
Export data
-
Export the navigation path file After the navigation path is drawn, click
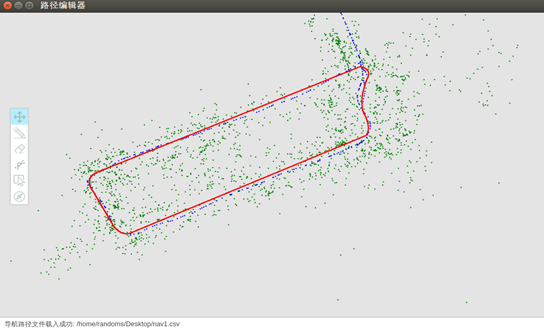
File -> Export Navigation Path Filein the menu in the upper left corner and select the location where the file is saved. After exporting the file, you can also import it from the menu for secondary editing. -
Export Navigation Key File After the navigation key is drawn, click
File -> Save Navigation Pointin the menu in the upper left corner and select the file save location. After exporting the file, you can also import it from the menu again for secondary editing. Note: Navigation keys can only be imported after the navigation path file has been successfully imported.
The exported data can be placed in Xiaoqiang’s corresponding folder to start visual navigation.
-