Navigation

    蓝鲸ROS机器人论坛

    • Register
    • Login
    • Search
    • Categories
    • Tags
    • Popular
    1. Home
    2. weijiz
    3. Posts
    ROS交流群
    ROS Group
    产品服务
    Product Service
    开源代码库
    Github
    官网
    Official website
    技术交流
    Technological exchanges
    激光雷达
    LIDAR
    ROS教程
    ROS Tourials
    深度学习
    Deep Learning
    机器视觉
    Computer Vision
    • Profile
    • Following 0
    • Followers 11
    • Topics 248
    • Posts 705
    • Best 11
    • Groups 1

    Posts made by weijiz

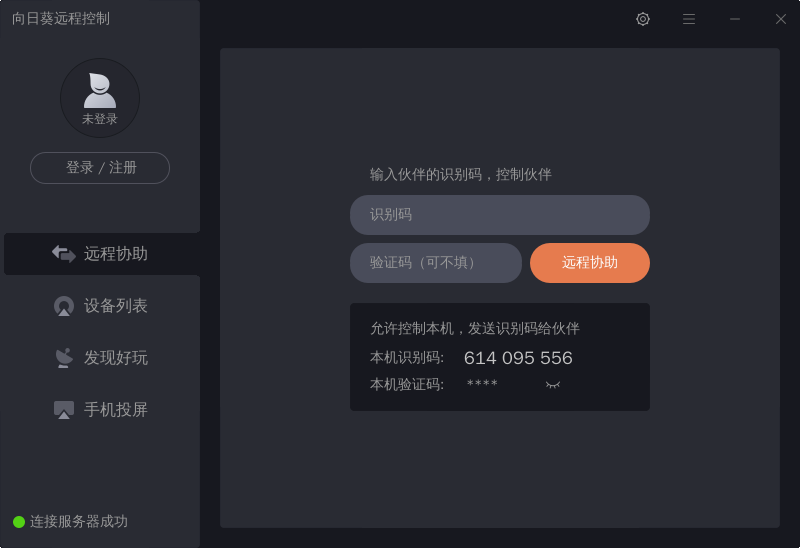
    • 在Ubuntu 20.04上安装向日葵远程软件

      从官网下载对应的deb文件然后执行后

      sudo dpkg -i SunloginClient-10.0.2.24779_amd64.deb
      

      会出现如下的错误

      正在选中未选择的软件包 sunloginclient。
      (正在读取数据库 ... 系统当前共安装有 429221 个文件和目录。)
      准备解压 SunloginClient-10.0.2.24779_amd64.deb  ...
      正在解压 sunloginclient (10.0.2-24779) ...
      dpkg: 依赖关系问题使得 sunloginclient 的配置工作不能继续:
       sunloginclient 依赖于 libwebkitgtk-3.0-0;然而:
        未安装软件包 libwebkitgtk-3.0-0。
      
      dpkg: 处理软件包 sunloginclient (--install)时出错:
       依赖关系问题 - 仍未被配置
      

      提示缺少libwebkitgtk-3.0-0依赖。这个软件在之前版本的Ubuntu中是存在的,但是20.04中移除了。所以我们只要添加之前版本的Ubuntu的软件源,然后安装就可以了。

      在/etc/apt/source.list文件中添加

      deb http://mirrors.huaweicloud.com/repository/ubuntu/ bionic main universe
      

      然后执行

      sudo apt update
      

      更新软件源。然后再执行

      sudo apt install -f
      

      自动安装缺少的依赖就可以了。

      2020-08-06 13-27-50屏幕截图.png

      安装完成后及时把添加的软件源从软件源列表中移除,防止和系统其它软件冲突。
      最后再 sudo apt update更新一下软件源信息就可以了

      posted in 技术交流
      weijiz
      weijiz
    • RE: 使用xiaoqiang_track进行人体跟随和追踪

      @xxyh 对 是这样的

      posted in 技术交流
      weijiz
      weijiz
    • RE: 作者大大,可以在Ubuntu19.10版本的无桌面版中应用吗?

      @石泽文 没试过,你可以试试

      posted in 技术交流
      weijiz
      weijiz
    • RE: 在Ubuntu 20.04上使用Systemback

      @willsmith 原版本文件超过4G就不能转iso

      posted in 技术交流
      weijiz
      weijiz
    • RE: 在Ubuntu 20.04上使用Systemback

      @willsmith 是不是nvme的硬盘,有人反映不支持这个。其他的到没遇到过

      posted in 技术交流
      weijiz
      weijiz
    • 修复 Gitlab Web IDE 无法正常显示文件的问题

      在使用Gitlab时,如果使用的不是Gitlab自带的nginx服务器,那么很有可能在Gitlab的Web IDE上打开软件源文件会发现是空文件。即使你完全按照官方的说明配置nginx也还是会这样。因为官方的nginx配置文件已经4年没有更新了,很多配置已经不再适合。

      这个问题解决方法很简单,把Gitlab自带的nginx的配置文件复制到自己的nginx配置里面,稍作修改就可以了。Gitlab自带的nginx配置文件位于 /var/opt/gitlab/nginx/conf/gitlab-http.conf

      文件内容如下

      # This file is managed by gitlab-ctl. Manual changes will be
      # erased! To change the contents below, edit /etc/gitlab/gitlab.rb
      # and run `sudo gitlab-ctl reconfigure`.
      
      ## GitLab
      ## Modified from https://gitlab.com/gitlab-org/gitlab-ce/blob/master/lib/support/nginx/gitlab-ssl & https://gitlab.com/gitlab-org/gitlab-ce/blob/master/lib/support/nginx/gitlab
      ##
      ## Lines starting with two hashes (##) are comments with information.
      ## Lines starting with one hash (#) are configuration parameters that can be uncommented.
      ##
      ##################################
      ##        CHUNKED TRANSFER      ##
      ##################################
      ##
      ## It is a known issue that Git-over-HTTP requires chunked transfer encoding [0]
      ## which is not supported by Nginx < 1.3.9 [1]. As a result, pushing a large object
      ## with Git (i.e. a single large file) can lead to a 411 error. In theory you can get
      ## around this by tweaking this configuration file and either:
      ## - installing an old version of Nginx with the chunkin module [2] compiled in, or
      ## - using a newer version of Nginx.
      ##
      ## At the time of writing we do not know if either of these theoretical solutions works.
      ## As a workaround users can use Git over SSH to push large files.
      ##
      ## [0] https://git.kernel.org/cgit/git/git.git/tree/Documentation/technical/http-protocol.txt#n99
      ## [1] https://github.com/agentzh/chunkin-nginx-module#status
      ## [2] https://github.com/agentzh/chunkin-nginx-module
      ##
      ###################################
      ##         configuration         ##
      ###################################
      
      upstream gitlab-workhorse {
        server unix:/var/opt/gitlab/gitlab-workhorse/socket;
      }
      
      
      server {
        listen *:80;
      
      
        server_name bw-server;
        server_tokens off; ## Don't show the nginx version number, a security best practice
      
        ## Increase this if you want to upload large attachments
        ## Or if you want to accept large git objects over http
        client_max_body_size 0;
      
      
        ## Real IP Module Config
        ## http://nginx.org/en/docs/http/ngx_http_realip_module.html
      
        ## HSTS Config
        ## https://www.nginx.com/blog/http-strict-transport-security-hsts-and-nginx/
        add_header Strict-Transport-Security "max-age=31536000";
      
        ## Individual nginx logs for this GitLab vhost
        access_log  /var/log/gitlab/nginx/gitlab_access.log gitlab_access;
        error_log   /var/log/gitlab/nginx/gitlab_error.log;
      
        if ($http_host = "") {
          set $http_host_with_default "bw-server";
        }
      
        if ($http_host != "") {
          set $http_host_with_default $http_host;
        }
      
        ## If you use HTTPS make sure you disable gzip compression
        ## to be safe against BREACH attack.
      
      
        ## https://github.com/gitlabhq/gitlabhq/issues/694
        ## Some requests take more than 30 seconds.
        proxy_read_timeout      3600;
        proxy_connect_timeout   300;
        proxy_redirect          off;
        proxy_http_version 1.1;
      
        proxy_set_header Host $http_host_with_default;
        proxy_set_header X-Real-IP $remote_addr;
        proxy_set_header X-Forwarded-For $proxy_add_x_forwarded_for;
        proxy_set_header Upgrade $http_upgrade;
        proxy_set_header Connection $connection_upgrade;
        proxy_set_header X-Forwarded-Proto http;
      
        location / {
          proxy_cache off;
          proxy_pass  http://gitlab-workhorse;
        }
      
        location /assets {
          proxy_cache gitlab;
          proxy_pass  http://gitlab-workhorse;
        }
      
        error_page 404 /404.html;
        error_page 422 /422.html;
        error_page 500 /500.html;
        error_page 502 /502.html;
        location ~ ^/(404|422|500|502)(-custom)?\.html$ {
          root /opt/gitlab/embedded/service/gitlab-rails/public;
          internal;
        }
      
      
      }
      

      稍作修改成下面这样

      # This file is managed by gitlab-ctl. Manual changes will be
      # erased! To change the contents below, edit /etc/gitlab/gitlab.rb
      # and run `sudo gitlab-ctl reconfigure`.
      
      ## GitLab
      ## Modified from https://gitlab.com/gitlab-org/gitlab-ce/blob/master/lib/support/nginx/gitlab-ssl & https://gitlab.com/gitlab-org/gitlab-ce/blob/master/lib/support/nginx/gitlab
      ##
      ## Lines starting with two hashes (##) are comments with information.
      ## Lines starting with one hash (#) are configuration parameters that can be uncommented.
      ##
      ##################################
      ##        CHUNKED TRANSFER      ##
      ##################################
      ##
      ## It is a known issue that Git-over-HTTP requires chunked transfer encoding [0]
      ## which is not supported by Nginx < 1.3.9 [1]. As a result, pushing a large object
      ## with Git (i.e. a single large file) can lead to a 411 error. In theory you can get
      ## around this by tweaking this configuration file and either:
      ## - installing an old version of Nginx with the chunkin module [2] compiled in, or
      ## - using a newer version of Nginx.
      ##
      ## At the time of writing we do not know if either of these theoretical solutions works.
      ## As a workaround users can use Git over SSH to push large files.
      ##
      ## [0] https://git.kernel.org/cgit/git/git.git/tree/Documentation/technical/http-protocol.txt#n99
      ## [1] https://github.com/agentzh/chunkin-nginx-module#status
      ## [2] https://github.com/agentzh/chunkin-nginx-module
      ##
      ###################################
      ##         configuration         ##
      ###################################
      
      upstream gitlab-workhorse {
        server unix:/var/opt/gitlab/gitlab-workhorse/socket;
      }
      
      
      server {
        listen *:80;
      
      
        server_name git.bwbot.org;
        server_tokens off; ## Don't show the nginx version number, a security best practice
      
        ## Increase this if you want to upload large attachments
        ## Or if you want to accept large git objects over http
        client_max_body_size 0;
      
      
        ## Real IP Module Config
        ## http://nginx.org/en/docs/http/ngx_http_realip_module.html
      
        ## HSTS Config
        ## https://www.nginx.com/blog/http-strict-transport-security-hsts-and-nginx/
        add_header Strict-Transport-Security "max-age=31536000";
      
        ## Individual nginx logs for this GitLab vhost
        access_log  /var/log/gitlab/nginx/gitlab_access.log;
        error_log   /var/log/gitlab/nginx/gitlab_error.log;
      
        if ($http_host = "") {
          set $http_host_with_default "git.bwbot.org";
        }
      
        if ($http_host != "") {
          set $http_host_with_default $http_host;
        }
      
        ## If you use HTTPS make sure you disable gzip compression
        ## to be safe against BREACH attack.
      
      
        ## https://github.com/gitlabhq/gitlabhq/issues/694
        ## Some requests take more than 30 seconds.
        proxy_read_timeout      3600;
        proxy_connect_timeout   300;
        proxy_redirect          off;
        proxy_http_version 1.1;
      
        proxy_set_header Host $http_host_with_default;
        proxy_set_header X-Real-IP $remote_addr;
        proxy_set_header X-Forwarded-For $proxy_add_x_forwarded_for;
        proxy_set_header Upgrade $http_upgrade;
        #proxy_set_header Connection $connection_upgrade;
        proxy_set_header X-Forwarded-Proto http;
      
        location / {
          proxy_cache off;
          proxy_pass  http://gitlab-workhorse;
        }
      
        location /assets {
          #proxy_cache gitlab;
          proxy_pass  http://gitlab-workhorse;
        }
      
        error_page 404 /404.html;
        error_page 422 /422.html;
        error_page 500 /500.html;
        error_page 502 /502.html;
        location ~ ^/(404|422|500|502)(-custom)?\.html$ {
          root /opt/gitlab/embedded/service/gitlab-rails/public;
          internal;
        }
      
      
      }


      把上面的host name改成自己的就可以了。然后把文件保存在/etc/nginx/sites-enabled。下面重启nginx服务就可以了。

      sudo nginx -s reload
      

      这样WebIDE的文件就可以正常显示了

      486fee1a-dc1e-492d-85ee-80fed890481d-image.png

      posted in 技术交流
      weijiz
      weijiz
    • RE: 人体追踪时候,如何调出实时监测画面?

      @xxyh 参照rviz的使用教程 http://community.bwbot.org/topic/147/ 订阅对应的图像话题

      posted in 讨论区
      weijiz
      weijiz
    • RE: 在自己的笔记本(ubuntu18.04 ros-melodic)上编译navigation,出现很多错误

      @joy 在 在自己的笔记本(ubuntu18.04 ros-melodic)上编译navigation,出现很多错误 中说:

      我的电脑上是

      你可以给你的电脑装小强镜像。或者直接用vnc去操作小强,这样就和你自己电脑没关系了。

      posted in 技术交流
      weijiz
      weijiz
    • RE: 在自己的笔记本(ubuntu18.04 ros-melodic)上编译navigation,出现很多错误

      @joy 要看到具体错误才知道。估计是缺软件包依赖。navigation包可以直接apt install 去安装,没必要去源码编译

      posted in 技术交流
      weijiz
      weijiz
    • RE: 小强ROS机器人教程(27)___bw_auto_dock自动充电功能包的使用和实现原理

      @Slim 你的软件包应该没有编译成功。先学习一下ros软件包的基础知识,这个包要放到你自己ros工作空间去编译。

      posted in 产品服务
      weijiz
      weijiz
    • RE: BW-DR03驱动器问题

      @hxk426 装在机器人上使用ROS控制的吗,使用的驱动要对应才行

      posted in 产品服务
      weijiz
      weijiz
    • 如何创建自己的apt软件源

      在做Linux软件开发,当成功生成deb文件之后如何把软件包分发给用户呢。通常的做法就是创建自己的apt软件源了。
      创建apt软件源有一个非常好用的工具aptly

      aptly 软件文档

      软件安装

      在 /etc/apt/sources.list 中添加

      deb http://repo.aptly.info/ squeeze main
      

      添加公钥

      apt-key adv --keyserver pool.sks-keyservers.net --recv-keys ED75B5A4483DA07C
      

      安装软件

      apt-get update
      apt-get install aptly
      

      创建软件源

      在自己的服务器上创建软件源。首先修改默认的软件源保存路径

      vim ~/.aptly.conf
      

      设置root路径, 下面的路径会用来存储软件源数据。根据自己的需求进行设置。后面还需要设置网路服务器保证下面的路径可以从网络访问。所以不要在此文件夹内放其他重要数据。

      {
      "rootDir": "/home/bwbot/data/src/mirrors/packages"
      ......
      }
      
      aptly repo create stable
      

      添加软件包

      *.deb为你的deb文件名

      aptly repo add *.deb
      

      发布软件源

      aptly publish repo -distribution=stable stable
      

      更新发布

      当有新的deb文件需要发布的时候,可以通过上面的aptly repo add 再次添加deb文件,然后执行下面的指令更新发布

      aptly publish update stable
      

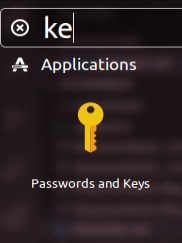
      这一步会需要gpg密钥。如果没有就需要自己创建。同时创建完成之后还要把自己的gpg公钥上传到公钥服务器上。如果是Ubuntu的话可以用系统自带的Passwords and Keys进行操作。这个软件自带生成密钥和上传密钥的功能。

      6c505802-8c5d-470b-9bb5-7b5198155a51-image.png

      设置网络服务器

      上面我们修改了软件源路径,下面我们要设置网络服务器,使得那个路径可以通过http访问。下面是一个nginx的例子配置

      server {
              server_name mirrors.bwbot.org;
              root /home/bwbot/data/src/mirrors/packages/public;
      
              location / {
                      alias /home/bwbot/data/src/mirrors/packages/public/;
                      autoindex on;
                      expires 30d;
              }
      
          listen 80;
      
      }
      

      注意audoindex一定要设置成on

      客户软件源设置

      当客户要下载软件时在客户机器,首先添加服务器的公钥

      sudo apt-key adv --keyserver 'hkp://keyserver.ubuntu.com:80' --recv-key 7D9C279F
      

      上面是我的例子。其中hkp://keyserver.ubuntu.com:80'是密钥服务器的地址,和上传时自己的选择有关系。7D9C279F是服务器密钥的ID可以通过gpg相关指令查看。

      添加服务器软件源地址

      sudo sh -c 'echo "deb [arch=amd64] http://mirrors.bwbot.org/ stable main" > /etc/apt/sources.list.d/systemback.list'
      

      其中 deb [arch=amd64] http://mirrors.bwbot.org/ stable main为软件源地址,也就是你的服务器的网络地址。systemback.list为创建的软件源文件名称。这个可以根据自己需求进行修改,最后以.conf结尾就可以 了。

      然后正常的更新,安装软件就可以了

      apt-get update
      apt-get install xxxx
      
      posted in 技术交流
      weijiz
      weijiz
    • 在Ubuntu 20.04上使用Systemback

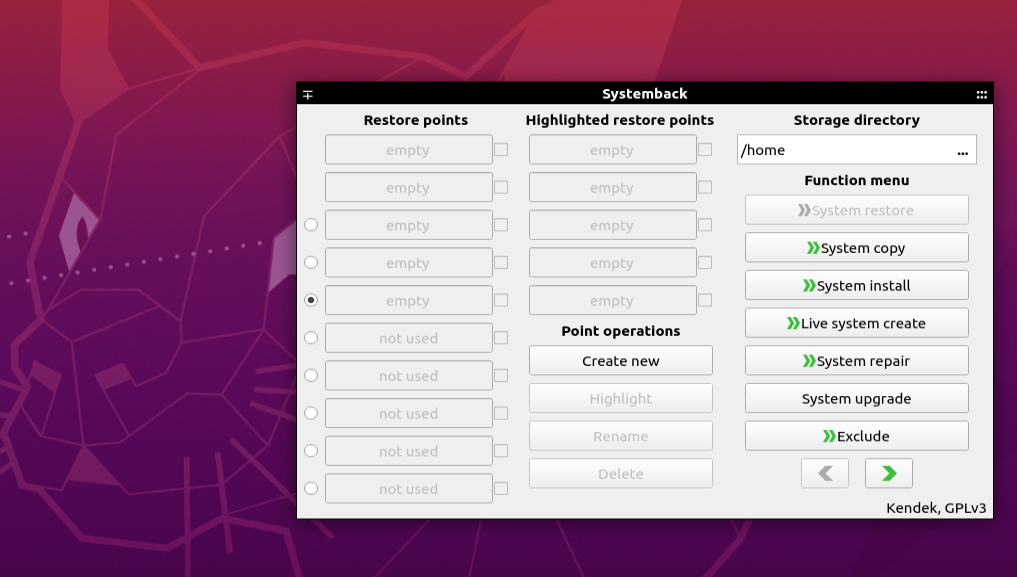
      Systemback 是一个优秀的Linux系统备份还原软件。这个软件不仅能够备份还原系统,还能够把系统做成启动盘和ISO镜像,用于在其他机器上分发系统。但是作者已经放弃维护这个软件。软件也无法继续在Ubuntu 20.04运行。我就花了点时间对Systemback进行了开发使其支持在Ubuntu 20.04上工作。同时添加了软件对大文件的支持。现在软件生成的系统镜像ISO不再受限于4G大小。

      更新后的Systemback

      软件安装

      sudo sh -c 'echo "deb [arch=amd64] http://mirrors.bwbot.org/ stable main" > /etc/apt/sources.list.d/systemback.list'
      sudo apt-key adv --keyserver 'hkp://keyserver.ubuntu.com:80' --recv-key 50B2C005A67B264F
      sudo apt-get update
      sudo apt-get install systemback
      

      321fd303-4294-41f7-b6bf-f600dc0d512e-image.png

      posted in 技术交流
      weijiz
      weijiz
    • Ubuntu 20.04 VNC 安装与设置

      VNC是一个远程桌面协议。按照本文的说明进行操作可以实现用VNC对Ubuntu 20.04进行远程控制。一般的VNC安装方式在主机没有插显示器的时候是无法使用的。下面的操作可以在主机有显示器和没有显示器时都能够正常工作。

      首先安装x11vnc

      sudo apt-get install x11vnc -y
      

      设置vnc密码

      sudo x11vnc -storepasswd /etc/x11vnc.pass 
      

      创建x11vnc自启动服务

      创建 /etc/systemd/system/x11vnc.service,并写入以下内容

      [Unit]
      Description=Start x11vnc at startup.
      After=multi-user.target
      [Service]
      Type=simple
      ExecStart=/usr/bin/x11vnc -auth /run/user/1000/gdm/Xauthority -forever -loop -noxdamage -repeat -rfbauth /etc/x11vnc.pass -rfbport 5900 -shared
      [Install]
      WantedBy=multi-user.target
      

      启动x11vnc服务

      sudo systemctl enable x11vnc
      sudo service x11vnc start
      

      此时如果远程的主机上接了显示器,那么就可以在局域网通过VNC进行访问了。

      为了能够保证远程主机无论是否有显示器,我们都能通过VNC进行远程访问,我们还要做下面的修改

      创建默认的xorg.conf文件

      sudo Xorg :1 -configure
      

      此时程序会生成 /root/xorg.conf.new文件
      我的默认文件内容如下

      Section "ServerLayout"
      	Identifier     "X.org Configured"
      	Screen      0  "Screen0" 0 0
      	InputDevice    "Mouse0" "CorePointer"
      	InputDevice    "Keyboard0" "CoreKeyboard"
      EndSection
      
      Section "Files"
      	ModulePath   "/usr/lib/xorg/modules"
      	FontPath     "/usr/share/fonts/X11/misc"
      	FontPath     "/usr/share/fonts/X11/cyrillic"
      	FontPath     "/usr/share/fonts/X11/100dpi/:unscaled"
      	FontPath     "/usr/share/fonts/X11/75dpi/:unscaled"
      	FontPath     "/usr/share/fonts/X11/Type1"
      	FontPath     "/usr/share/fonts/X11/100dpi"
      	FontPath     "/usr/share/fonts/X11/75dpi"
      	FontPath     "built-ins"
      EndSection
      
      Section "Module"
      	Load  "glx"
      EndSection
      
      Section "InputDevice"
      	Identifier  "Keyboard0"
      	Driver      "kbd"
      EndSection
      
      Section "InputDevice"
      	Identifier  "Mouse0"
      	Driver      "mouse"
      	Option	    "Protocol" "auto"
      	Option	    "Device" "/dev/input/mice"
      	Option	    "ZAxisMapping" "4 5 6 7"
      EndSection
      
      Section "Monitor"
      	Identifier   "Monitor0"
      	VendorName   "Monitor Vendor"
      	ModelName    "Monitor Model"
      EndSection
      
      Section "Device"
              ### Available Driver options are:-
              ### Values: <i>: integer, <f>: float, <bool>: "True"/"False",
              ### <string>: "String", <freq>: "<f> Hz/kHz/MHz",
              ### <percent>: "<f>%"
              ### [arg]: arg optional
              #Option     "Accel"              	# [<bool>]
              #Option     "AccelMethod"        	# <str>
              #Option     "Backlight"          	# <str>
              #Option     "CustomEDID"         	# <str>
              #Option     "DRI"                	# <str>
              #Option     "Present"            	# [<bool>]
              #Option     "ColorKey"           	# <i>
              #Option     "VideoKey"           	# <i>
              #Option     "Tiling"             	# [<bool>]
              #Option     "LinearFramebuffer"  	# [<bool>]
              #Option     "HWRotation"         	# [<bool>]
              #Option     "VSync"              	# [<bool>]
              #Option     "PageFlip"           	# [<bool>]
              #Option     "SwapbuffersWait"    	# [<bool>]
              #Option     "TripleBuffer"       	# [<bool>]
              #Option     "XvPreferOverlay"    	# [<bool>]
              #Option     "HotPlug"            	# [<bool>]
              #Option     "ReprobeOutputs"     	# [<bool>]
              #Option     "XvMC"               	# [<bool>]
              #Option     "ZaphodHeads"        	# <str>
              #Option     "VirtualHeads"       	# <i>
              #Option     "TearFree"           	# [<bool>]
              #Option     "PerCrtcPixmaps"     	# [<bool>]
              #Option     "FallbackDebug"      	# [<bool>]
              #Option     "DebugFlushBatches"  	# [<bool>]
              #Option     "DebugFlushCaches"   	# [<bool>]
              #Option     "DebugWait"          	# [<bool>]
              #Option     "BufferCache"        	# [<bool>]
      	Identifier  "Card0"
      	Driver      "intel"
      	BusID       "PCI:0:2:0"
      EndSection
      
      Section "Screen"
      	Identifier "Screen0"
      	Device     "Card0"
      	Monitor    "Monitor0"
      	SubSection "Display"
      		Viewport   0 0
      		Depth     1
      	EndSubSection
      	SubSection "Display"
      		Viewport   0 0
      		Depth     4
      	EndSubSection
      	SubSection "Display"
      		Viewport   0 0
      		Depth     8
      	EndSubSection
      	SubSection "Display"
      		Viewport   0 0
      		Depth     15
      	EndSubSection
      	SubSection "Display"
      		Viewport   0 0
      		Depth     16
      	EndSubSection
      	SubSection "Display"
      		Viewport   0 0
      		Depth     24
      	EndSubSection
      EndSection
      

      将此文件复制至 /usr/share/X11/xorg.conf.d/xorg.conf

      这个文件保证在主机上插有显示器的时候,系统界面能在显示器上正常显示。下面我们再给系统添加一个虚拟显示器,当主机没有显示器的时候系统就使用这个虚拟显示器。

      安装虚拟显卡驱动

      sudo apt install xserver-xorg-video-dummy
      

      在这个文件的最后添加下面的内容

      Section "Monitor"
        Identifier "Monitor1"
        HorizSync   1.0 - 2000.0
        VertRefresh 1.0 - 200.0
        # Add 16:9 modes, others are automatically detected.
        Modeline "1280x720" 74.48 1280 1336 1472 1664 720 721 724 746
        Modeline "1920x1080" 172.80 1920 2040 2248 2576 1080 1081 1084 1118
      EndSection
      
      
      Section "Device"
        Identifier "Card1"
        Driver "dummy"
        VideoRam 256000
      EndSection
      
      Section "Screen"
        DefaultDepth 24
        Identifier "Screen1"
        Device "Card1"
        Monitor "Monitor1"
        SubSection "Display"
          Depth 24
          Modes "1920x1080"
        EndSubSection
      EndSection
      

      这样我们就创建了一个使用虚拟显卡的虚拟显示器。为了让虚拟的显示器和真实显示器都能工作,我们需要把最上面的 ServerLayout 进行更改

      Section "ServerLayout"
              Identifier     "X.org Configured"
              Screen      0  "Screen0" 0 0
      	Screen      1  "Screen1" 0 0
      EndSection
      

      现在重新启动远程电脑,就可以在没有显示器的情况下远程了。

      以上的方法还有一个问题。就是在用户没有登录的其情况下是没办法远程的。所以需要把用户设置成自动登录。
      posted in 技术交流
      weijiz
      weijiz
    • Gitlab 更新后gitlab-ctl reconfigure 提示 can only have one web server puma unicorn 错误

      在更新从老版本更新到14.0版本后,自动更新失败,手动执行gitlab-ctl reconfigure后,程序提示 can only have on web server puma unicorn 的错误。此错误是由于新版本的gitlab默认使用puma代替unicorn。如果你的配置文件里面以前启动了uncorn的设置,那么就会出现puma和unicorn冲突的问题。解决方法就是把原来unicorn的配置改为puma。具体参数可以对照此表

      更改完成后再次执行gitlab-ctl reconfigure就可以成功了

      posted in 技术交流
      weijiz
      weijiz
    • RE: 小强ROS机器人教程(10)___使用kinect进行自主移动避障

      @Wallong 因为Kinect的tf矩阵当时是按照-19度标定的,同时-19度是kinect的最小角度,也能够保证kinect能够完整的看到小车前方,保证没有盲区。如果你想要换其他角度也可以,只要按照这里重新标定角度就可以了。

      posted in 产品服务
      weijiz
      weijiz
    • RE: 小强AMCL导航,可以自主定位吗?为什么rviz里每次都需要手动定位(2d pose estimate)才可以?

      @山中客 amcl算法就是这样的,需要手动指定初始位置。

      posted in 激光雷达
      weijiz
      weijiz
    • RE: 为什么小强gmapping 建图清晰度不够?附图

      具体的tf位置在这里

      posted in 激光雷达
      weijiz
      weijiz
    • RE: 为什么小强gmapping 建图清晰度不够?附图

      @山中客 对,根据自己的安装参数修改tf

      posted in 激光雷达
      weijiz
      weijiz
    • RE: 为什么小强gmapping 建图清晰度不够?附图

      @山中客 这个显然是错误了,不只是清晰度不够。看看里程计准不准还有雷达有没有装反

      posted in 激光雷达
      weijiz
      weijiz
    • 1
    • 2
    • 10
    • 11
    • 12
    • 13
    • 14
    • 35
    • 36
    • 12 / 36